Mini Series 4: When Hearts Stop - Child CPR Simplified
Loading quiz...
Readiness Check
Grow your understanding and celebrate your progress
How many rescue breaths start our CPR sequence for children?
Rescue Breathing
Rescue Breathing starts at the airway - without a clear and open airway we cannot possibly deliver an effective breath!
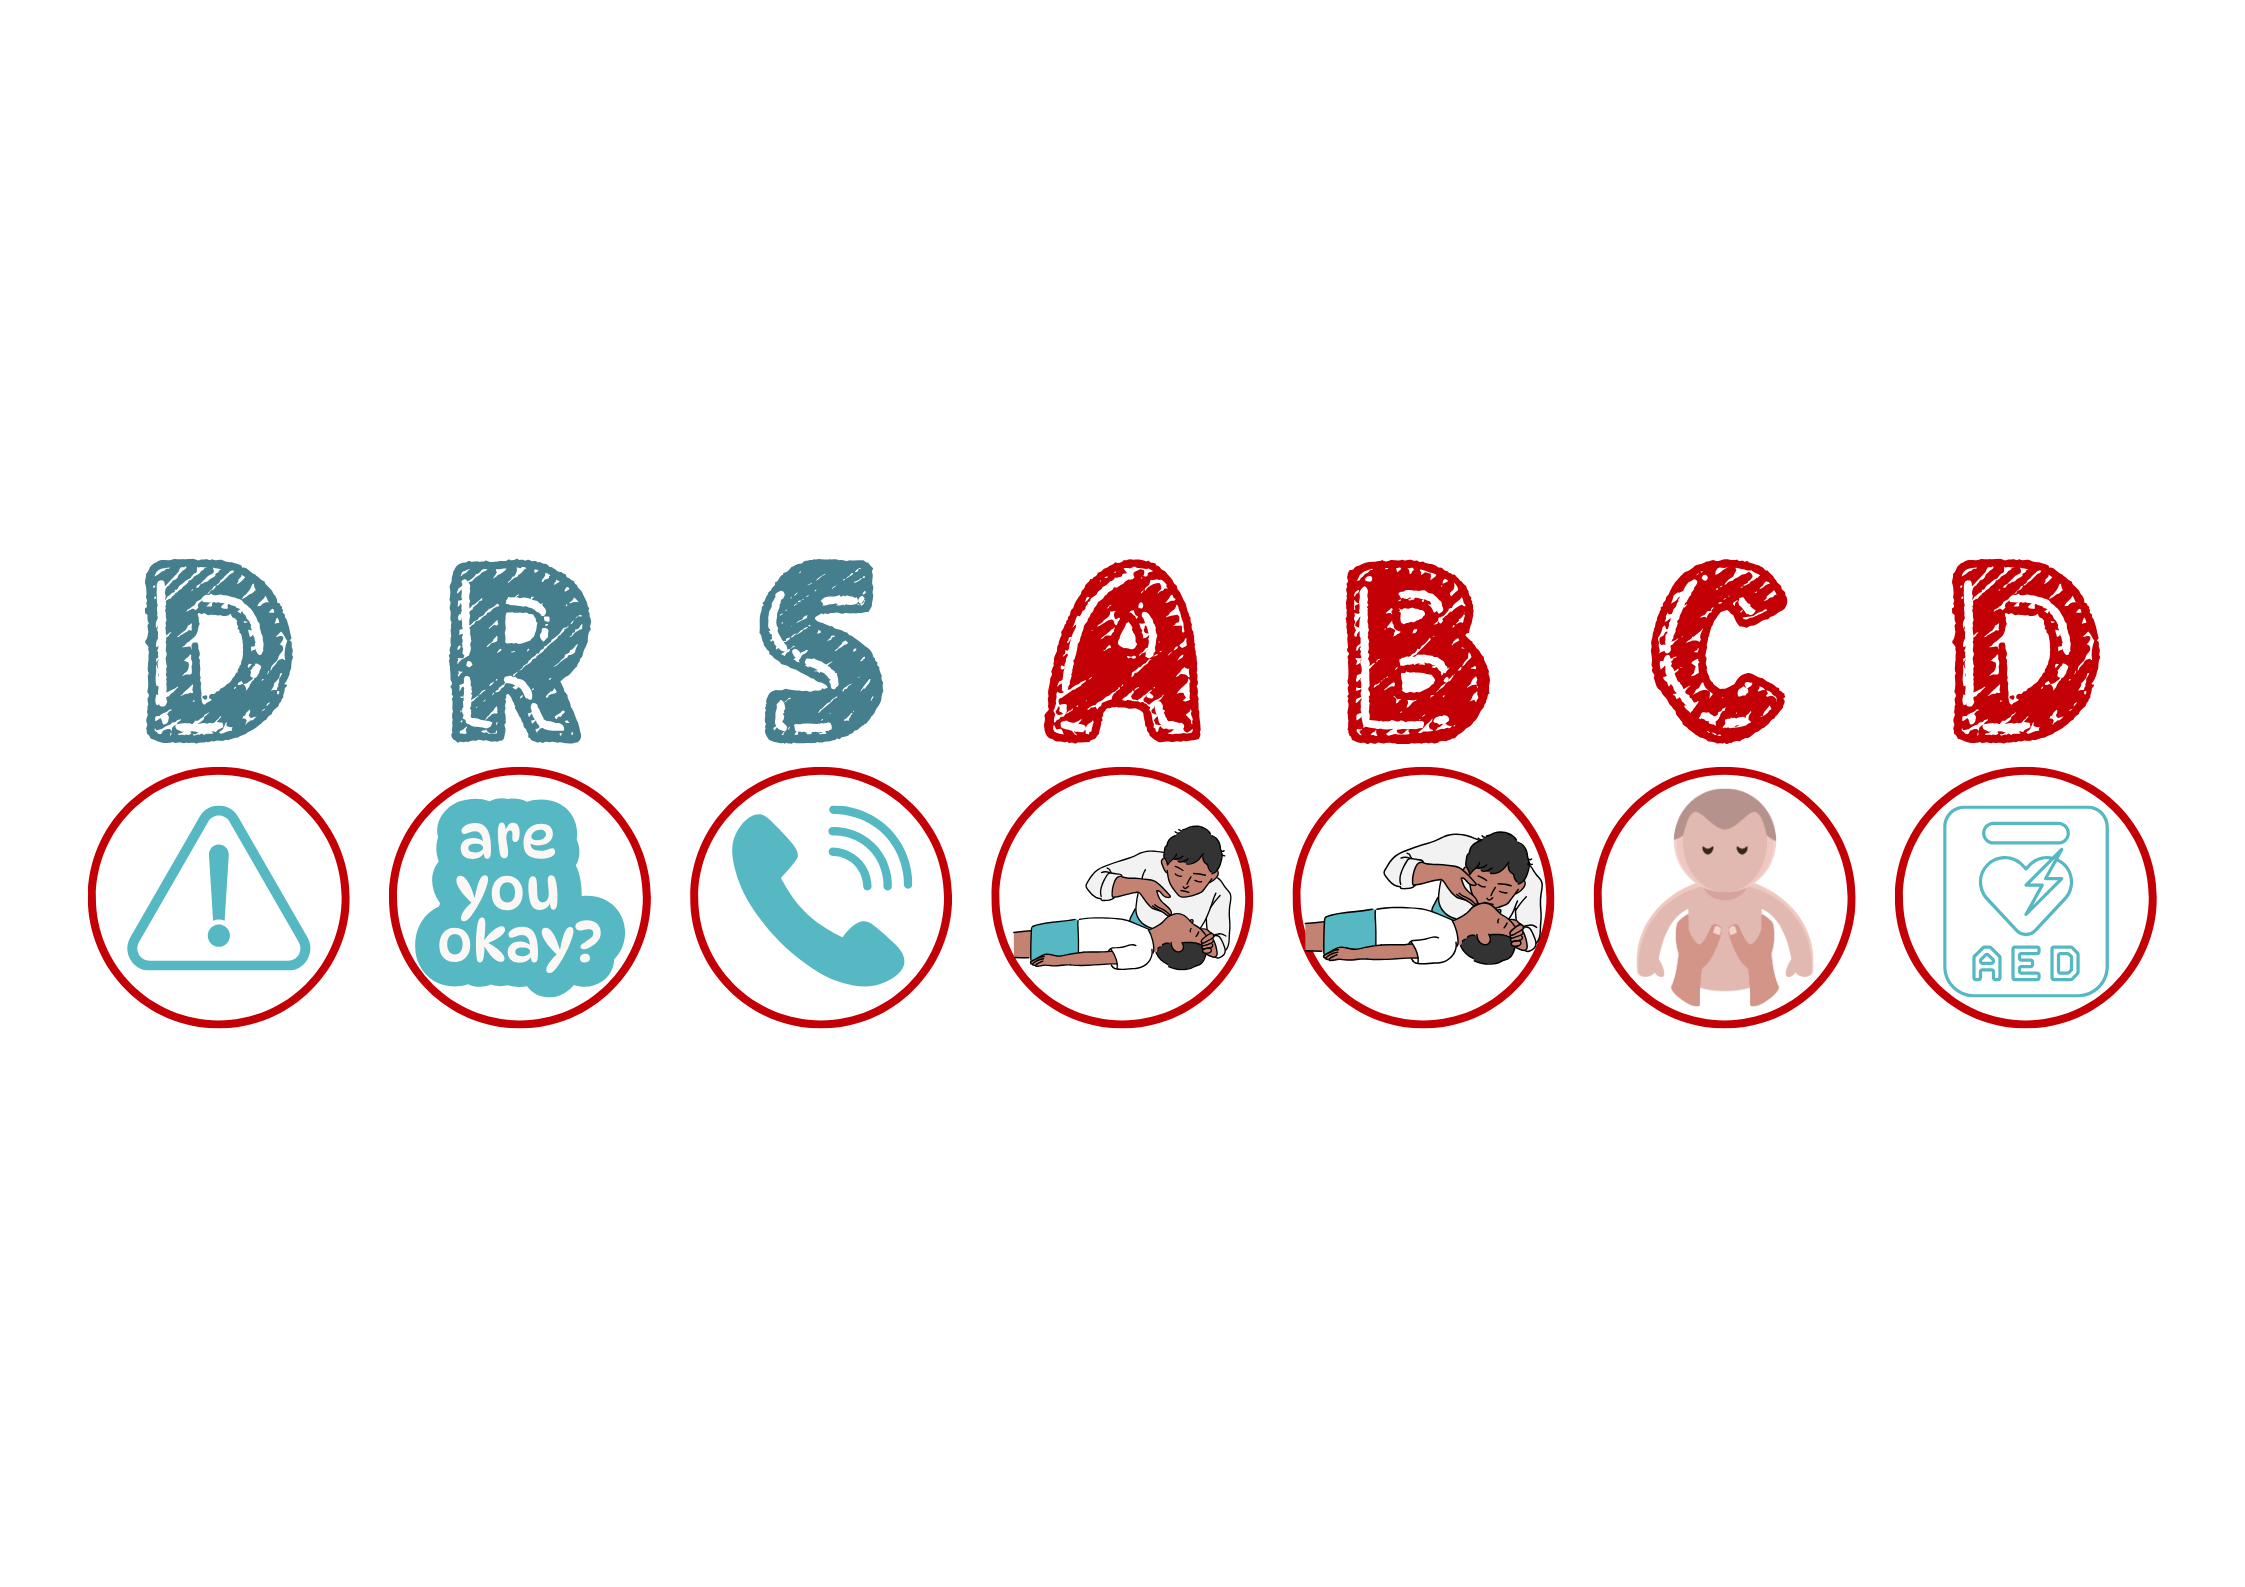
Our assessment follows the DRS ABCD method, you should ask yourself the following 3 questions:
-
Always check that there is nothing blocking them from breathing before opening their airway.
If you see an obstruction and can remove it with a pinch go for it - but DO NOT blindly finger sweep into their mouths. Sweeping pushes obstruction further in.
-
Opening their airway looks different depending on their age/size.
Infants (<1 year old) need a neutral position. Their nose should point to the ceiling.
To maintain this position use a rolled up towel or tee under their shoulder blades to offset their large heads.
For children aged 1 and up we use the “Sniffing The Morning Air” position.
As they get older they are more excited to smell the air and thus get a further head tilt.
Adolescents (12-18) will get a more pronounced head-tilt-chin-lift.
-
Look, Listen and Feel for normal breathing for up to 10 seconds.
If it looks abnormal - we call it agonal - it’s not adequate breathing.
You should see chest/abdominal rise and fall.
Remember:
Normal breathing is quiet.
Silence = Not Breathing!

Infant = Neutral To Open Airway
Babies have large head compared to their body, soft neck tissues, and undeveloped muscle tone.
These features mean that when a baby goes unresponsive they will be unable to maintain their own airway. They tend to go chin-to-chest, which due to the soft neck tissues, actually blocks them from being able to breathe.
We place their heads in a neutral position to open their airway.
This means:
Lying flat on their backs
Rolled up towel/tee under shoulder blades
Nose points to ceiling

Seal Mouth and Nose
Babies have tiny faces and their noses are designed to be difficult to pinch shut.
Thus we have to seal their mouth and nose with our lips in order to deliver rescue breaths.
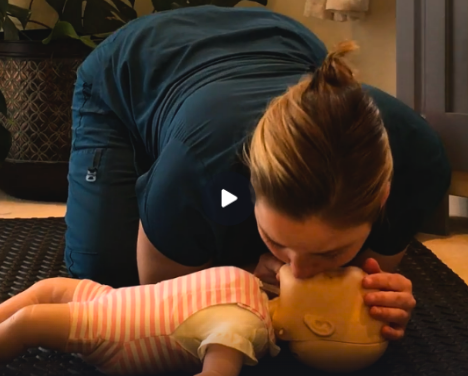
The lungs of an infant are incredibly small and thus require a miniscule amount of air to inflate!
Give slow, gentle, puffs of air, and stop the moment you see their chest rise.
If the chest rises you have given a breath!
Gentle Puffs of Air
Kids 1 +
Sniffing The Morning Air
Kids over 1 year get a gentle head-tilt-chin-lift to open their airways.
When we deliver rescue breaths we place a hand on their forehead and use those fingers to pinch their nose shut, then we seal their mouth with our lips.
Gentle puffs of air are more than enough - stop when you see their chest rise.

Common Mistakes
Here are some of the common mistakes we see with rescue breathing and how to avoid them!

Your lips should not look like any sort of kiss - instead your lips must wrap all the way around the outside of their mouth.
You are acting as a face mask and must create a seal with your lips.
It should look more like you’re about to take a huge bite!
It’s Not A Kiss
It’s Not Blowing Candles
Your breath should be a gentle puff of air - less like blowing out candles and more like a sigh after a long day!

It’s Not Meant To Cause Liftoff!
Your breath needs to be concise - that means you stop your exhale when you see their chest rise!
We’re only giving enough air to help them breathe - not send them to the moon!